

Table of contents
Hey! Welcome to my first blog. I just decided to write about what I am working on and those pieces of code I found a little bit tricky to get at. I learned how to use multer and cloudinary as a part of a project I am building right now
In this very first blog, I am gonna show you how can you upload various files, of different extensions to Cloudinary (back-end).
Stack :
Nodejs
Express
Multer
Cloudinary
Pre-requisites :
- Some Basic Knowledge of Nodejs and Express will do the trick
Our main focus will be on file uploading, so we aren't gonna look at what NodeJs and Express essentially are!
You can read about Nodejs and Express here
1. Multer
1.1 What is Multer
Let's see what the README file of multer says.
Multer is a node.js middleware for handling
multipart/form-data, which is primarily used for uploading files. It is written on top of busboy for maximum efficiency.
What it essentially is a middleware, which helps express to handle files we work with (can be image, pdf etc)
Let me show you what the file we receive (front-end) will be converted to while processing on the back-end
These are the command you need to run before executing any code.
Initiate a node project in the directory of your choice
npm init -y
install the dependencies
npm i express multer cloudinary
Now comes the code
const express= require('express');
const app=express()
const multer=require('multer')
const path=require('path')

//uploader corresponds to multer middleware

const uploader=multer({
    storage: multer.diskStorage({}) //say to multer to store the intermediate in diskstorage before uploading
}).single('image') //this line of code is explained below in the article


app.post('/upload',uploader, (req,res)=>{
    console.log(req.file)
    res.send('Check Console')
})

app.listen(3000,()=>{
    console.log('Listening on post 3000......')
})
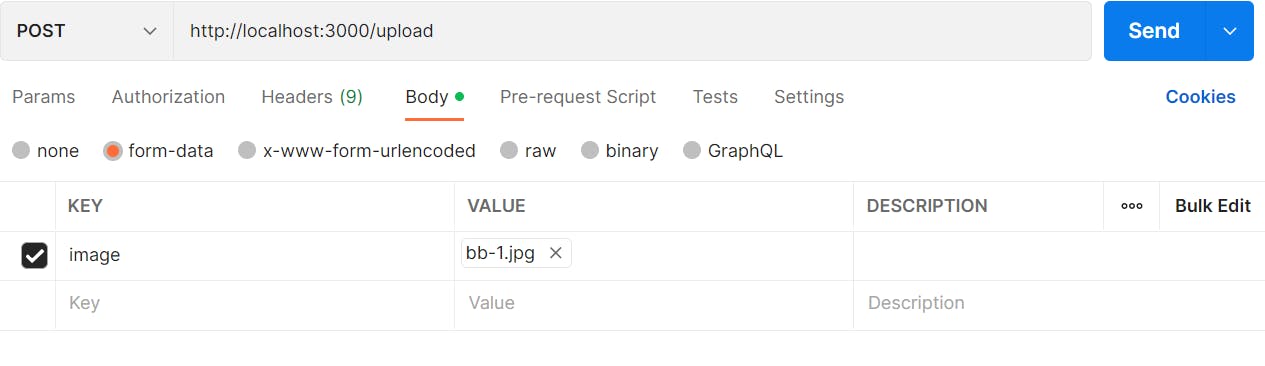
Here "uploader" middleware is what enables us to deal with form-data (mulitipart files) which we later send using postman
Note: The key of the data should be 'image' as configured with the multer middleware
Run the server
node app.js
The output is shown below
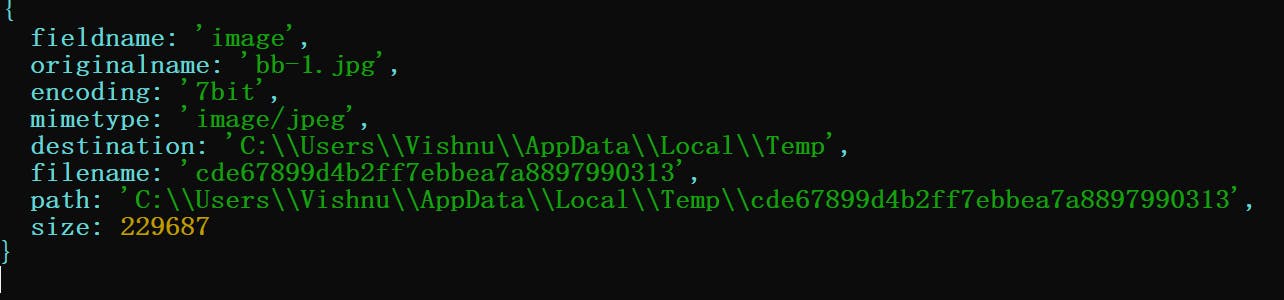
We got quite a lot of fields, let's go through them one by one
fieldname : This the key value which we use when sending request using postman
originalname : This is the original name of the file which we are trying to upload
encoding and mimetype : These are related to the file we uploaded
destination : as mentioned before multer uses diskstorage (as per our configuration) , this is the corresponding destination
filename , path, size : These are self explanationary
Note how i used
console.log(req.file)
for logging how the file is stored or transferred! At first, I too didn't know about it. I found this very helpful
Multer does the work of
body-parserby attaching the values of text fields in thereq.bodyobject. Multer also creates a new object for multiple files, eitherreq.fileorreq.files, which holds information about those files. From the file object, you can pick whatever information is required to post the file to a media management API, like Cloudinary.
So now that's sorted, let's talk about cloudinary
2. Cloudianry
The web can answer "What is cloudinary?" better than me! I am not gonna try my luck at that
Let's jump directly to configuration and Image upload
we have a npm package to work with cloudinary
Here is the code to configure your cloud
const cloudinary=require('cloudinary').v2


cloudinary.config({
    cloud_name:"your_cloud_name",
    api_key:"your_api_key",
    api_secret:"your_api_secret"
})
You can get all three from your cloudinary account!
Putting It all together
const express= require('express');
const app=express()
const multer=require('multer')
const path=require('path')
const cloudinary=require('cloudinary').v2


cloudinary.config({
    cloud_name:"your_cloud_name",
    api_key:"your_api_key",
    api_secret:"your_api_secret"
})
//uploader corresponds to multer middleware

const uploader=multer({
    storage: multer.diskStorage({}) //say to multer to store the intermediate in diskstorage before uploading
}).single('image') //this line of code is explained below in the article


app.post('/upload',uploader, async  (req,res)=>{
    const data= await cloudinary.uploader.upload(req.file.path,{
        folder:"folder_name_of_your_choice",
    })
    console.log(data)
    return res.send("Uploaded!!")
})

app.listen(3000,()=>{
    console.log('Listening on post 3000......')
})
There are few options in the above code , let me explain them below
If you are curious about what .v2 means while importing cloudinary package, here's what it says on cloudinary docs
Important
The Node.js SDK upload and admin method syntax examples shown throughout this documentation use thev2signature. To avoid confusion, all code examples are shown in the format
cloudinary.v2....In your own code, it is recommended to include
v2of the Node.js classes as followsvar cloudinary = require('cloudinary').v2;Following this, your upload and Admin API calls should omit the
.v2shown in the code examples of this guide.
For example, a simple image upload:cloudinary.uploader .upload("my_image.jpg") .then(result=>console.log(result));
the folder option specifies to which folder we want to upload to, It is created for us by cloudinary on the cloud
here's the output,
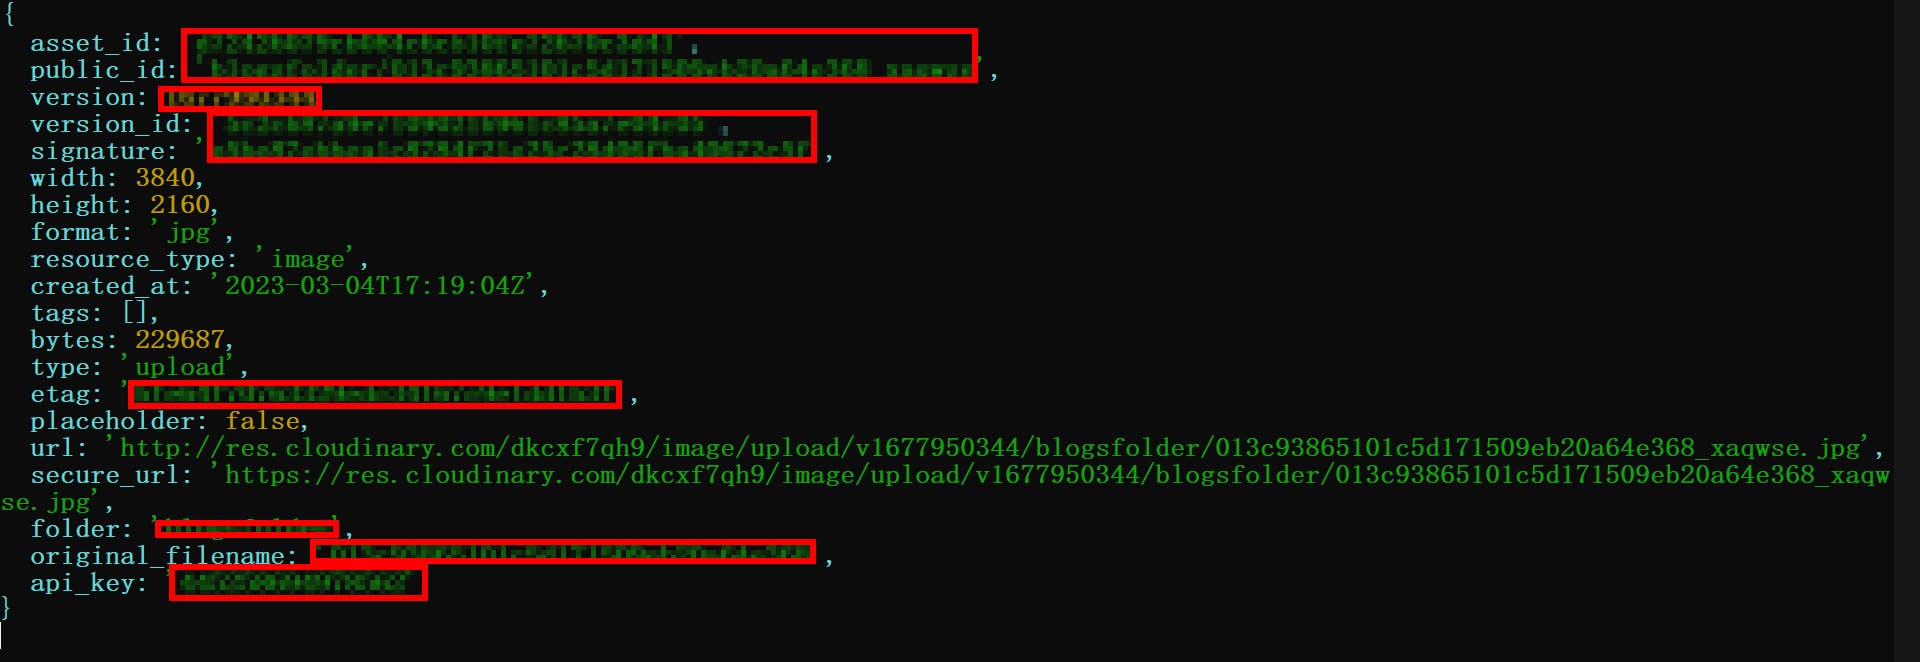
We get the URL, where we can use accordingly (may be sent to send front-end to render)
Conclusion
This sums the basic file uploading functionality with cloudinary, multer, nodejs and express.
Note that we didnot do any error handling here, that will be in the coming blog.
The next blog will feature how to use fileFilter option while using multer so that we can restrict types of files we allow to upload